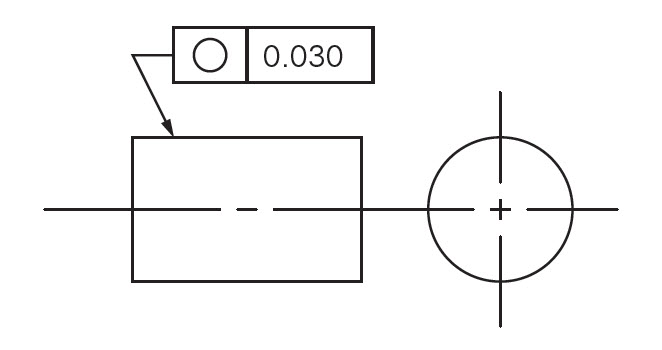
If this is your first time through the cylindrical (shaft) gage buying process, you are going to be presented with a myriad of choices. Where cylindrical parts are concerned, one choice is whether to buy a machine that provides radial measurement from a single-contact point probe (commonly referred to as a roundness gage), or one that uses opposing-point contacts for diameter measurement (a diameter gage). Each has its specific use.
With both gage types, the measurement transducers travel perpendicular to the axis of the part. With the opposing point gage, it is less critical to control the part axis relative to the measurement probes. A relatively large runout in the spindle has less effect on the type of measurement (diameters) it performs. As the part moves toward one probe it moves away from the other. So, the relative size measurement of the part remains the same (although vertical movement of the part can affect the result when a radiused follower is used). With such a system, a cheaper spindle with a relatively high runout may be used without adversely affecting the measurement.
However, a two-point system is inadequate for measuring roundness. Here’s why:
Imagine a cylinder that has a tri-lobe or “cloverleaf” pattern around its circumference. As one of the probes rides into a valley, the other approaches a peak. To the two-point diameter gage, this part appears round. This is certainly not what we want when measuring such a key feature as roundness! Instead, the single-contact point (radial) gage is needed. (Note: This type of gauge contacts one point at any given time, but the part is rotated to collect the entire data set). The single-point contact gage can provide much more than diameter measurements. However, there is a price to be paid. In order to make accurate radial measurements, we must control the axis of the part, while rotating it for measurement. This requires a system that can captivate the part securely while introducing very little runout error. A precision spindle is therefore essential with this gage. Factor in the weight of the part and you require a very specialized kind of precision spindle. This accounts for a large part of the price difference between a diameter gage and a roundness, or profile, gage.
A common mistake is to buy a two-point gage based on price, only to find out later that it cannot inspect key features such as radial profile, chatter, and roundness.
But, where the two-point contact gage cannot give you roundness, the single-point contact gage can also give you diameter. This is because the entire point cloud has been stored, relative to the precise center of the part. So, we need only apply a little math to get the average diameter, or a max/min two-point diameter, etc.
Beware of the two-point gage that attempts to mimic the results of the single-point gage. Such terms as “diametric roundness” and “ovality” are used as mathematical attempts to approximate a roundness measurement. Nowhere in the roundness standards (ISO, ANSI, or JIS) is an exception made that allows for manipulation of the opposing point gage data. Although the ovality measurement may have some value, (but there are better ways to quantify such an error) it is NOT a substitute for a true roundness measurement.
Sometimes it is worth it to invest a little more up-front to acquire a gage that can make ALL the measurements that your project, or a future project, needs.

