Can you buy a high-accuracy roughness tester (profilometer) at a low price?
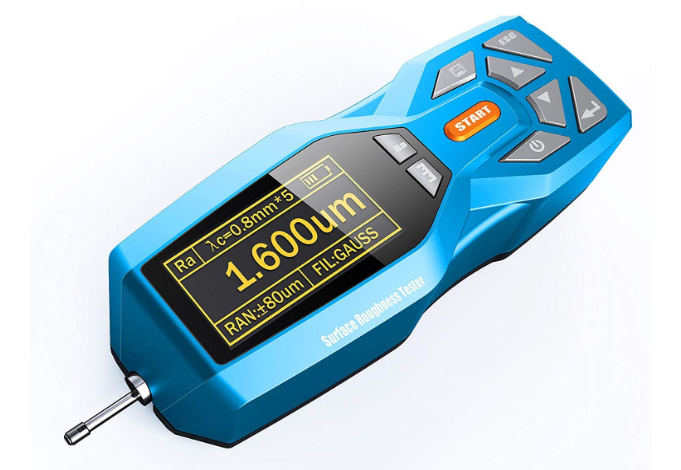
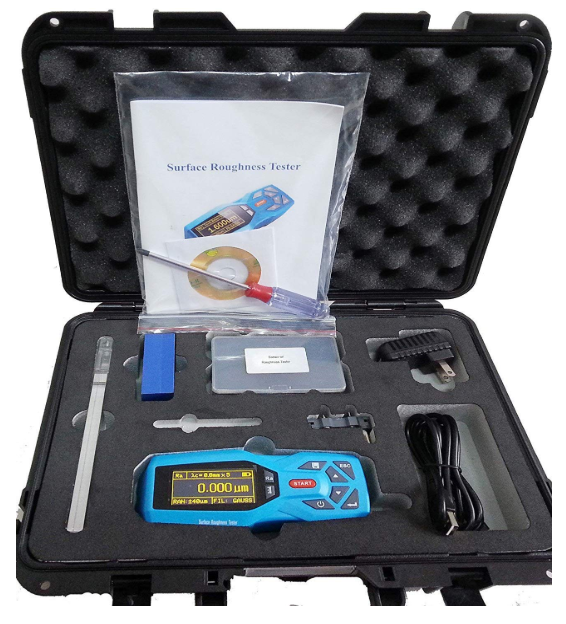
We’ve found an affordable surface finish gauge that can compete with the accuracy, repeatability, and features of more expensive profilometers made by Mahr and Jenoptik. The main difference is that this one can be had for ~$1000–complete, delivered, and returnable. Portable, rechargeable, and the results can be stored on board, or downloaded to a PC.
While a handheld profilometer can cost over $7,500 from other suppliers, you are paying extra to support the sales reps and high OEM overhead. Buying directly from the manufacturer on Amazon brings you this surface roughness checker with the lowest price available.
Sold securely through the Amazon Industrial site, your purchase is backed by Amazon’s easy return policy. Try it out at no risk! We are sure you’ll be pleased with this rugged surface finish tester, delivered in days, through Amazon!
★Testing parameters: Ra, Rz, Rq, Rt, Rp, Rv, R3z, R3y, RzJIS, Rsk, Rku, Rsm, Rmr, Rx, RPc, Rk, Rpk, Rvk, Mr1, Mr2
★Measuring range (um):Ra: 0.005-16.000; Rz: 0.02-160.00
★Convenient data recording and storage.
★Performance equal to the big names (you pay for their brands and their overhead!).
★Can be connected to a computer and printer
The Roughness Tester Feature List
*Handheld, lightweight, and easy to use
*Break-resistant skidded stylus
*Uses a DSP chip to control and data processing
* High-speed, with low power consumption
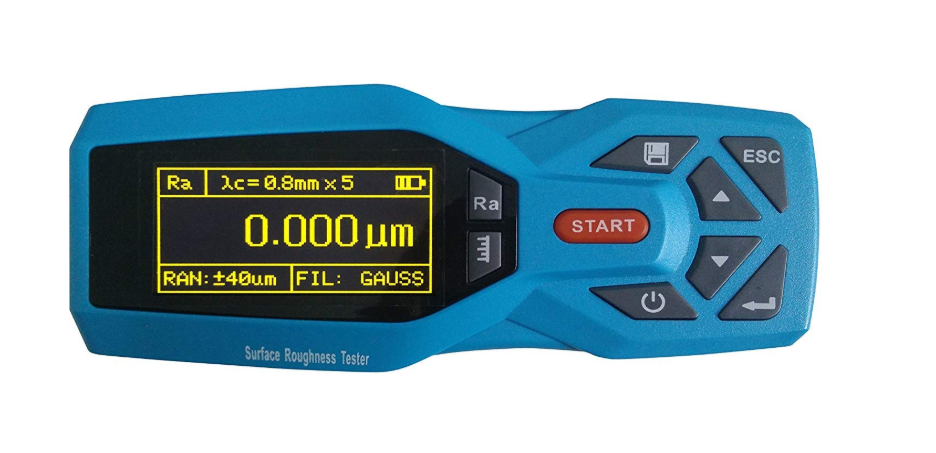
*128 x 64 OLED dot matrix display
*Intuitive and rich display for parameters and graphics
*Compatible with ISO, DIN, ANSI, and JIS national standards
*Time to Recharge Warning
*Continuous working time: more than 20 hours!
*Convenient data recording and storage.
*With automatic sleep, shutdown, and power-saving
*Reliable control motor and software design
*Measurement information display, menu prompt information, false information, and other prompts
*Optional Bluetooth function.
Order with confidence, directly from Amazon Industrial Supply!
The Roughness Tester Specifications
*Measures Ra, Rz, Rq, Rt, Rp, Rv, R3z, R3y, RzJIS, Rsk, Rku, Rsm, Rmr, Rx, RPc, Rk, Rpk, Rvk, Mr1, Mr2
*Measuring range (um):Ra: 0.005-16.000
*Rz: 0.02-160.00
*Sample length (mm):0.25, 0.80, 2.50
*Evaluation length(mm):(1-5)
*Maximum drive stroke:17.5mm/0.7inch
*Indication accuracy:0.001
*Indication error:±(7-10)%
*Variability:<6%
*Data Storage:100 groups
*Power: Rechargeable lithium-ion battery
*Working temperature:-20℃~40℃
*Size:158mmx63.5mmx46mm
Replacement Stylus for thIS Roughness Tester
A stylus replacement is also offered on the Amazon Industrial site and can be purchased using the buy button, below.

Tiny Hole stylus and detector for this roughness tester
This small hole stylus is suitable for holes larger than 2mm in diameter.
About Roughness Testers (Surface Profilometers)
Profilometry is a technique used to extract topographical data from the surface of a part. The data can consist of a single point, a line scan, or even a full 3D areal scan. The purpose of profilometry is to get surface morphology, step heights, and/or surface roughness.
A profilometer is a measuring instrument used to record surface profile, in order to quantify its roughness. Critical dimensions such as step, curvature, and flatness are computed from the surface topography. Profilometers are also known as “Surface Roughness Testers” or “Surface Finish Gauges” and can measure the micro-irregularities (roughness) of a given material.
Profilometers can be of the contact, or “tactile” variety (typically a diamond stylus) or optical-based, non-contact (e.g.: a white light interferometer or scanning confocal microscope).
For most shop measurements, a contact profilometer is more than adequate. Here, a diamond stylus is moved vertically in contact with a sample and then moved laterally across the surface for a specified distance, with a specific contact force. The profilometer measures small surface variations in vertical stylus displacement as a function of lateral position. Typical profilometers can measure small vertical features ranging in height from 10 nanometres to 1 millimeter. With modern roughness checkers, the vertical (height) position of the diamond profilometer stylus generates an analog signal which is converted into a digital signal and stored for analysis and display. The radius of the diamond stylus ranges from 20 nanometres to 50 microns (um), with the typical profilometer stylus size at 5 or 10 microns (μm). The stylus force can range from less than 1 to 50 milligrams.
The advantages of contact profilometers include acceptance, surface independence, and resolution. It is a direct technique that requires no modeling. Most of the world’s surface finish standards are written for contact profilometers. Often, contact metrology is REQUIRED to meet the proper definition of the roughness parameter. Contacting the surface is an advantage if the part has oil or rust preventative on the surface. Non-contact methods can end up measuring surface contaminants instead of the surface itself. Because the stylus is in contact with the surface, contact profilometers are not sensitive to surface reflectance or color. The stylus tip radius can be as small as 20 nanometres, which is significantly better than white-light optical profiling. Vertical resolution is typically sub-nanometer as well.
An absence of roughness is not always desirable and controlled roughness can be important. This could be for reasons of tribology on lubricated parts such as a camshaft, or for tactile purposes such as a control knob in an automobile. In each case, both amplitude and frequency are important to the part.
Surface roughness often shortened to roughness (or a specification like “Ra”), is a component of surface texture. It is quantified by the deviations in the direction of the normal vector of a real surface from its ideal form. In surface metrology theory, roughness is usually considered to be the high-frequency, short-wavelength component of a measured surface. In practice, it is often necessary to know both the amplitude and frequency to quantify the measurement for its intended use.
Roughness is often a good predictor of the performance of a mechanical component, since irregularities on the surface may form nucleation sites for cracks or corrosion. Roughness can also promote adhesion.
We have Profilometers for sale!
Surface Roughness (surface finish) Training:
Major Gage offers training on surface finish parameters when you are ready. To get you started, we suggest the following video which gives an overview of amplitude profile parameters from ISO 4287
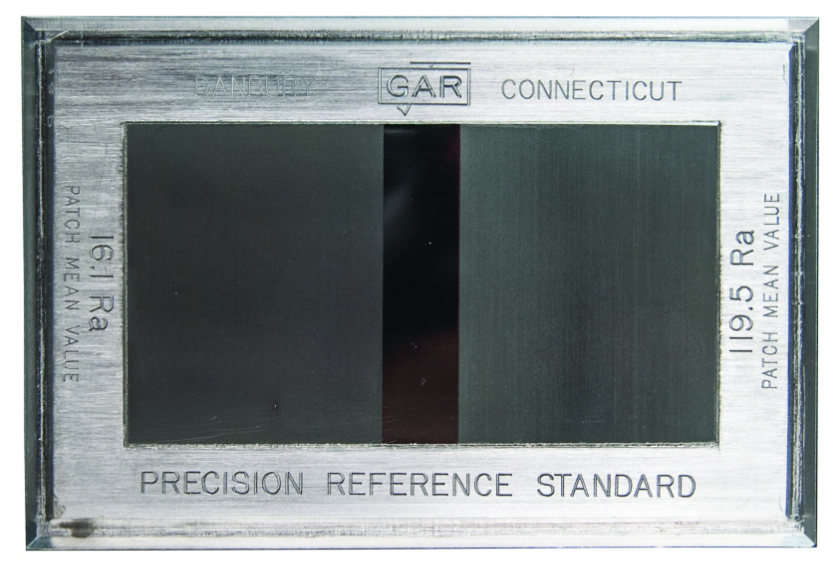
If you do not already have a precision roughness standard, we’d suggest taking a look at this one as it also includes a stylus check from Flexbar. The stylus check should be performed on a regular basis to guard against profilometer stylus wear or breakage. It’s also available for immediate shipment through Amazon, though there is a small shipping charge.
 Order with Confidence, directly from Amazon
If it’s your responsibility to buy profilometers, this unit is worth a look. I have to wonder why anyone would spend $1000s extra for a Jenoptik, Mitutoyo, or Mahr profilometer, when they can have class-leading accuracy, for less!
The basics of measuring surface roughness:
A profilometer is a device that measures the surface profile, roughness, and shape of materials. Surface roughness, which is (known as “areal surface finish” when 3D surface roughness is measured), is an important aspect of surface quality that affects the performance and reliability of products in various industries, such as manufacturing, automotive, aerospace, and electronics. Understanding how to measure surface roughness, and specifically the Ra value, is critical for ensuring product quality and monitoring production processes.
Ra, also known as “average roughness”, is the average deviation of the surface from its mean line, expressed in micrometers or microinches. It is the most widely used parameter for measuring surface roughness, as it provides a simple and straightforward method for characterizing the smoothness of a surface. To measure Ra, a profilometer is used to scan the surface of a material and collect data points at regular intervals, which are then analyzed to determine the average roughness value.
There are several factors that can impact the measurement of Ra, including the type of profilometer used, the quality of the stylus, the material being measured and the size of the stylus. For example, contact profilometers, which use a physical stylus to directly measure the surface of a material, are commonly used for measuring small areas and for materials with low surface roughness. Non-contact profilometers, on the other hand, use optical or laser technologies to measure the surface without physical contact and are ideal for measuring large areas and for materials with high surface roughness. Typically, a 2-um, 5-um, or 10-um stylus is used, with either a 60-degree or 90-degree tip angle.
In addition to measuring Ra, profilometers can also be used to measure other surface roughness parameters, such as Rq (root mean square roughness), Rz (ten-point height roughness), and Rt (peak-to-valley roughness). Understanding the differences between these parameters is important for selecting the appropriate profilometer and for ensuring that the measurements accurately reflect the surface quality.
The use of profilometers has numerous benefits in various industries. In the manufacturing industry, for example, profilometers are used to measure the surface roughness of products, such as gears, bearings, and other mechanical components. This information is used to ensure that the products meet quality standards and to monitor the production process for consistency. In the automotive industry, profilometers are used to measure the surface finish of engine parts, body panels, and other components, ensuring product quality and monitoring the manufacturing process for efficiency.
In the aerospace industry, profilometers are used to measure the surface finish of aircraft components, such as wing surfaces, fuselage, and engine parts. This information is used to ensure that the components meet safety and quality standards and to monitor the production process for consistency. In the electronics industry, profilometers are used to measure the surface roughness of semiconductor wafers, printed circuit boards, and other components, ensuring performance and quality standards and monitoring the production process for efficiency.
Profilometers (aka roughness testers) are critical for ensuring product quality and monitoring production processes in many industries. Understanding how to measure surface roughness, specifically the Ra value, is important for selecting the appropriate profilometer and for accurately characterizing the smoothness of a surface. Whether you’re looking to improve product quality, monitor production consistency, or improve manufacturing efficiency, the use of a profilometer is a tool that can help you achieve your goal of more consistent, quality parts.
