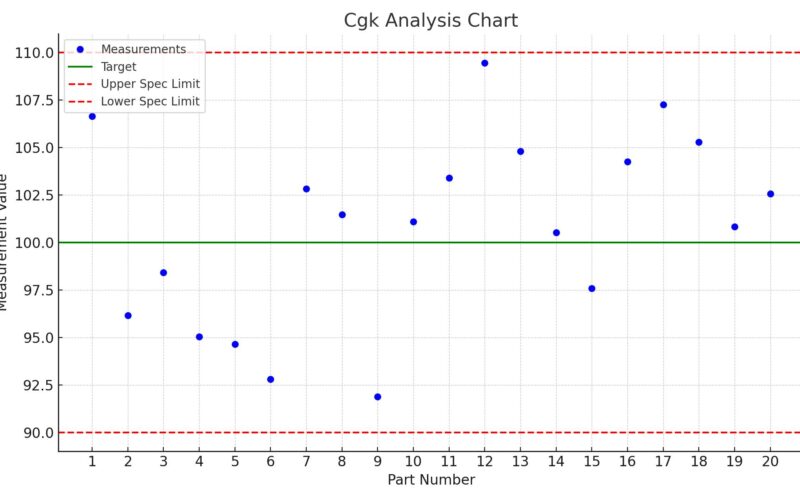
In industrial measurements, precision and accuracy are paramount. This guide demystifies gage repeatability and the crucial capability indices Cg and Cgk, enhancing your grasp on these concepts for improved application and analysis.
Defining Instrument Capability Indices: Cg & Cgk
Cg and Cgk are indices used to evaluate the performance of measuring instruments. Here’s what they signify:
- Cg focuses on the repeatability of an instrument. It compares the allowed variation with the actual variation the instrument displays. This index tells us how consistently an instrument can replicate measurements under unchanged conditions.
- Cgk extends the analysis by considering the instrument’s accuracy—its bias, or how far the average measured value is from the true value, alongside repeatability.
Calculating Cg and Cgk
The formulas for these indices offer a straightforward way to quantify instrument capability:
- For Cg: Cg = (Tolerance / 2) / (6 * Standard Deviation of the measurements), where “Tolerance” represents the allowed variation range of the measured characteristic and “Standard Deviation” is the statistical measure of the spread of the measurement data gathered from a gage study; a higher Cg value indicates better gage capability, with a generally accepted threshold of 1.33 or greater. The allowable variation could be a fraction of the process variation or the product specification range. The actual variation is determined through controlled testing, focusing solely on the instrument’s performance.
- For Cgk: Cgk = ((P/200) * Tolerance – |Bias|) / (SV/2), where “P” is a percentage of the tolerance used in the calculation (usually 20), “Tolerance” is the specified tolerance range, “Bias” is the absolute value of the measurement bias, and “SV” is the study variation (a measure of the gage’s repeatability), taking both the repeatability and accuracy of the measurement into account.

When to Conduct a Type 1 Gage Study
Initiate your measurement systems analysis with a Type 1 Gage Study. This step is crucial for:
- Evaluating the gage’s variation and bias independently from other sources.
- Laying the groundwork for comprehensive analysis by confirming the gage’s repeatability.
Using Minitab for Repeatability and Bias
- Assessing Repeatability with Cg: Minitab’s calculation of Cg compares the gage’s measurement variation against the part’s tolerance. A Cg value above 1.33 signals that the gage’s measurement spread is sufficiently narrow.
- Evaluating Bias with Cgk: Minitab uses a t-test to determine the gage’s bias, and the Cgk metric assesses both repeatability and bias. Achieving a Cgk of 1.33 is the benchmark for a capable gage.
Gage R&R Studies
- Type 1 Gage Study: This preliminary analysis checks the measurement system’s bias and repeatability through repeated measurements of a standard reference part. It’s an essential first step before progressing to more complex studies.
- Gage R&R Study: A deeper dive that helps identify and quantify the various sources of variation within the measurement system and the production process itself.
In addition, utilizing tools like Analysis of Variance (ANOVA), run charts, and histograms, these studies provide insights into measurement system variability, helping identify areas for improvement.
In Summary
Grasping the concepts of gage repeatability and the capability indices Cg and Cgk is fundamental for anyone involved in measurement processes for manufacturing. Starting with a Type 1 Gage Study ensures the reliability of your measurement system, setting a solid foundation for subsequent analyses. By applying these principles, you can ensure measurements are both precise and accurate—key components in maintaining quality control and facilitating process improvement.


