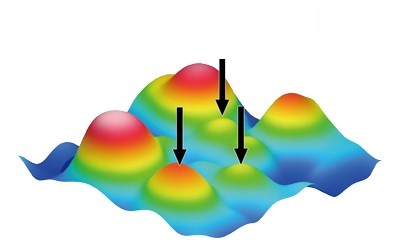
Have you ever scratched your head trying to understand White Light Interferometry, for profile and roughness measurement? Simply put, White Light Interferometry (WLI) is like using a special camera to take super detailed 3D pictures of a surface, showing all its tiny bumps and dips. Imagine you want to know how rough or smooth a surface is, like the screen of your phone or a piece of metal. Instead of touching it with something to measure it, which might not be accurate or could even damage it, we use light to do the job without ever touching it.
Here’s how it works in simpler terms:
- Light Source: First, we use a special kind of light called “white light,” which is just like the light you see coming from the sun or a lamp. This light has all different colors (wavelengths) mixed together.
- Splitting the Light: This light is sent towards a beam splitter, which is a device that divides the light into two paths. Think of it as a crossroads where the light has to decide which way to go.
- Two Paths: One path leads to a mirror (we’ll call this the reference mirror), and the other path goes to the surface we want to measure.
- Bouncing Back: The light that went to the mirror and the light that went to the surface both bounce back and meet again at the beam splitter. When they meet, they mix together, creating a pattern.
- Creating Patterns: The mixed light then goes to a camera or a detector, which records the patterns created when the two light paths meet again. These patterns are special because they change based on how the surface looks (all those tiny bumps and dips).
- 3D Picture: By moving the mirror or the surface slightly and taking lots of these pattern pictures, a computer can use the changes in the patterns to figure out the 3D shape of the surface. It’s like piecing together clues to map out all the little details.
- Super Detailed Measurement: This method is super accurate and can measure tiny features, even smaller than a single wavelength of light. It’s used in many areas, like checking the quality of components in your phone or car, making sure materials are the right shape and smoothness, and even in science and health for studying different materials and biological samples.
In essence, White Light Interferometry lets us “see” the tiny world of surface textures in 3D without touching it, using the power of light and some clever physics and math to get a detailed map of surfaces. But is it the RIGHT solution for your parts or would a tactile method work better for you?
White Light Interferometry (WLI) and traditional contact (tactile) stylus testers are two approaches to measuring the surface texture or roughness of materials. Each works in a different way and each method has its advantages and disadvantages. Understanding these can help decide which method is better suited for a particular application.
Advantages of White Light Interferometry
- Non-Contact Measurement: WLI doesn’t physically touch the surface being measured, which means it can measure delicate or soft surfaces without damaging them. This is a significant advantage over tactile methods that require physical contact with the surface.
- High Resolution and Accuracy: WLI can achieve very high resolution and accuracy, often down to the nanometer level. This allows for the detailed analysis of surface features that might be too small for tactile methods to detect accurately.
- 3D Surface Mapping: Unlike tactile methods that typically provide 2D profiles, WLI can create detailed 3D maps of a surface’s topography. This provides a more comprehensive understanding of the surface’s characteristics.
- Speed: WLI can measure surfaces quickly, especially when scanning large areas. This is because it captures a wide area at once, unlike a tactile probe that has to physically traverse the surface.
Disadvantages of White Light Interferometry
- Surface Type Limitation: Highly reflective or transparent materials can sometimes pose challenges for WLI, as they can cause scattering or transmission of light that affects the quality of the interference pattern.
- Complexity and Cost: WLI systems are typically more complex and expensive than tactile surface roughness testers. This can make them less accessible for smaller operations or for those who only need basic surface roughness measurements.
- Skill Level: Operating a WLI system and interpreting the results can require a higher level of skill and training. The data analysis is often more complex compared to the straightforward readings provided by tactile methods.
Advantages of Tactile Surface Roughness Testers
- Simplicity and Cost-effectiveness: Tactile testers are generally simpler and more cost-effective than WLI systems. They are easier to use and maintain, making them accessible for a wide range of applications.
- Flexibility with Materials: Tactile testers can be used on a variety of materials, including very soft and very hard surfaces, without the issues that can arise with WLI due to light reflection and refraction.
- Portability: Many tactile devices are portable, allowing for measurements to be taken directly on the shop floor or in the field, unlike the more stationary WLI setups.
Disadvantages of Tactile Surface Roughness Testers
- Contact Measurement: The need to touch the surface can be a disadvantage when measuring very delicate or easily damaged surfaces, where even the slightest contact could alter the surface or the measurement.
- Lower Resolution: Tactile methods generally cannot achieve the same high resolution and accuracy as WLI, especially for very small surface features.
- Limited to 2D Profiles: Most tactile testers provide 2D profiles of surface roughness, which might not capture all the details of a surface’s topography that a 3D mapping technique like WLI can.
In summary, the choice between white light interferometry and tactile surface roughness testing depends on the specific requirements of the measurement, including the type of surface being measured, the required resolution and accuracy, the measurement environment, and budget constraints.

